


Clip 1: WinLens3D - Tilts 1: the tools...
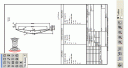
WinLens3D can now model systems with Tilts and Decenters [T&D]. T&D can be applied to components as a whole, to individual surfaces and/or to groups of components. We show:
- how to enter T&D values in the system data editor
- the enhanced lens drawing with wireframe or solid models and sliders for real time rotation
- the new global coordinates table
- ray trace table with global coordinates option
- enhancements to various graphs to cater for systems with no symmetry
- how to setup sliders to handle T&D for quick adjustments
Clip 2: WinLens3D - Tilts 2: the rules...
This clip discusses the coordinate system and basic rules for tilts and decenters within WinLens3D.
We discuss tilts on individual surfaces, including fold mirrors, and their effect on the reference axis. This is followed by a discussion of component level tilt, showing how to change defaults for individual elements.
We note in particular that a mirror can have both surface tilt and a component tilt - something very useful for modelling scanners, where the surface tilt sets up the basic geometry and the component tilt allows us to simply model the scanner motion.
Clip 3: WinLens3D - Tilts 3: Prisms...
In this simple clip we show how to add LINOS prisms to your system and how to create custom prisms from a whole range of options, using the Prism wizard.
LINOS prisms can be called up by entering the part number into the component column of the system data editor, or by drag & drop from the LINOS prism database
Custom prisms can be created by typing ‘prism’ into the the component column of the system data editor.
With the custom prisms, there is a wide range of prisms available, and a simple wizard enables you to create/edit them by specifying the values of a few key parameters.
Clip 4: WinLens3D - Tilts 4: Scanners...
We will show how to setup some reflective scanners, in such a way that it is easy to model the scanning motion of the mirrors using surface and component level tilts on the fold mirrors.
The basic geometry of the system is created by applying surface level tilts to the fold mirrors, which by default, folds the reference axis by 2x the tilt angle.
To model scanning a mirror without changing the geometry [the global location of any other component], we apply a component level tilt to the mirror.
We then show how to convert this to an X-XY scanner, by just changing the surface tilt on the second mirror from tilt-X to tilt-Y
Finally we inspect a model of a reflective polygon scanner - where a single mirror is used to represent the polygon. As before the surface fold gives the correct system geometry, and the component tilt on the mirror is used to simulate the scanning. This time however we offset the center of tilt of the component tilt to the theoretical polygon center.
To summarise, when setting up mirror scanners:
1) Use the surface tilt on the mirror to fold the reference axes correctly
2) Use the component tilts & offsets on the mirror to simulate scanning